Good Day Exchange engineers.
Today I am sharing with you the procedure on how to migrate your old exchange 2010 environment to exchange 2016.
Executing Summary
Microsoft Exchange Server 2016 brings a new set of technologies, features, and services to Exchange Server. Its goal is to support organizations as their work habits evolve from a communication focus to a collaboration focus. At the same time, Exchange 2016 helps lower the total cost of ownership when we deploy Exchange 2016 on-premises.
This document will cover all project steps we took to migrate Group Med Services messaging system from Exchange 2010 to Exchange 2016.
Exchange 2016 key benefits in compare to exchange 2010 more info here
Exchange 2016 helps you get more done through faster search and an inbox that is more personalized, more helpful, and more intelligent.
A simplified architecture, originally forged in the cloud, combines the mailbox and client access roles, so it’s easier to plan and scale your deployments. Streamlined coexistence with Exchange 2013 means easier upgrading.
Data loss prevention (DLP) in Exchange Server 2016 includes more in-the-box sensitive information types. And enhanced auditing enables better reporting and easier integration with third-party tools.
With its new approach to attachments that eliminates versioning headaches, plus other enhancements, Exchange Server 2016 makes working together on documents easier.
Exchange Server 2016 powers the latest Outlook experiences on phones, tablets, desktops, and the web so you can get more done, wherever you are.
Overview
Before starting it’s important to state that a key architectural change has been made in Exchange 2016. Exchange 2010 had 3 separate roles; Client Access, Hub Transport, Mailbox and Unified Messaging.
In Exchange 2016 only a single role is used, the Mailbox role. This contains all necessary components required for a full and complete email system.
There are some best practices and recommendation before implementing /deployment/migration, so in this document we are going migrate Exchange 2010 to Exchange 2016 while having coexistence.
Below are the main phases to follow:
- Assessment of existing Exchange 2010 environment and documentation phase
- Plan & Design Phase
- Define the Preferred Architecture phase
- Verify the Exchange Dependent Components Compatibility
- POC Phase
- Build & Integration Phase
- Pilot Migration
- Production deployment.
- Stabilization and Documentation
- Decommission
- Transition and Operations
Planning
As mentioned earlier there are some major changes on the Architectural of Exchange 2016, in Exchange 2010 we have 3 separate servers’ roles: Mailbox, Client Access, and HUB Transport & Unified Messaging. In Exchange 2016 Microsoft introduced only one server role, which contains all components.
As per Microsoft before migrating we have to follow up some best practices such as:
As exchange 2016 with only one role from the box, hardware sizing is the most critical part of deployment. We can use the Exchange 2016 server requirement calculator https://gallery.technet.microsoft.com/office/Exchange-2013-Server-Role-f8a61780 , which will give us a full hardware requirement view for our existing environment.
- Updating Existing Environment
Before introducing the Exchange 2016 into Existing environment we have to make sure that the update Exchange 2010 Service Pack 3 with Update Roll up 11 at least is installed or we have to install it prior deploying Exchange 2016. However we found that the environment is already at roll-up 18
- Directory Service Requirements
In Exchange 2016 Microsoft recommended first time minimum support Forest Functional Level and Domain Functional Level is now Windows 2008 or above. In our environment these levels are windows server 2008 R2.
Exchange 2016 support outlook 2010 and above on Windows.
All version of Outlook 2016 and Outlook 2013 are supported, Outlook 2010 is supported with the latest updates (KB2965295). In our environment we have updated versions of outlook 2010 and couple of users with outlook 2013.
Before implementation we have to document the names used by the clients to access the Exchange. In Coexistence with Exchange 2010, 2013 and Exchange 2016 allows sharing of the same HTTPS names for autodiscover, OWA, ActiveSync and other services, which will make the transition very easy. In our environment we found that the no publishing is done for OWA or ActiveSync and that only internal clients will connect through OWA or outlook clients. However we will prepare the environment to be able for later publishing options.
- Hardware Sizing for Exchange 2016
As per Recommended by Microsoft we have to prepare Hardware configuration for Exchange 2016, and make sure you have to run the sizing calculator.
I will recommend to go for Physical hardware if not or some business decision you are choosing
Virtualization then you have to follow up the guidance for Exchange 2016 in Virtualization under this link https://technet.microsoft.com/en-us/library/jj619301(v=exchg.160).aspx
- Assessment Existing Exchange 2010 environment
This is the very important part of any of the project phase we have to do the existing/legacy environment assessment, which will give us exact details of the old environment and very beneficial for the planning and designing phase of the project. Also it will give us chance to clean up the non-required data from existing 2010 environment.
I shall follow the below list of some easy tools and scripts to do the exchange 2010 assessment.
- Exchange 2010 Architecture Report
We can use following PowerShell script which will give us Architecture details.
Exchange 2010 Architecture Report https://gallery.technet.microsoft.com/office/Exchange-2010-Architecture-9368ff56
- Generate Exchange Environment Reports
Generating Exchange environment report is one of the best steps to upgrading/migrating your existing Exchange environment. There are multiple ways to generate your Exchange environment report but i will suggest user Steve Goodman’s PowerShell which will give you a good overview of your environment. This script generates a HTML report and can be scheduled and emailed. The script can be found under the link https://gallery.technet.microsoft.com/office/Generate-Exchange-2388e7c9
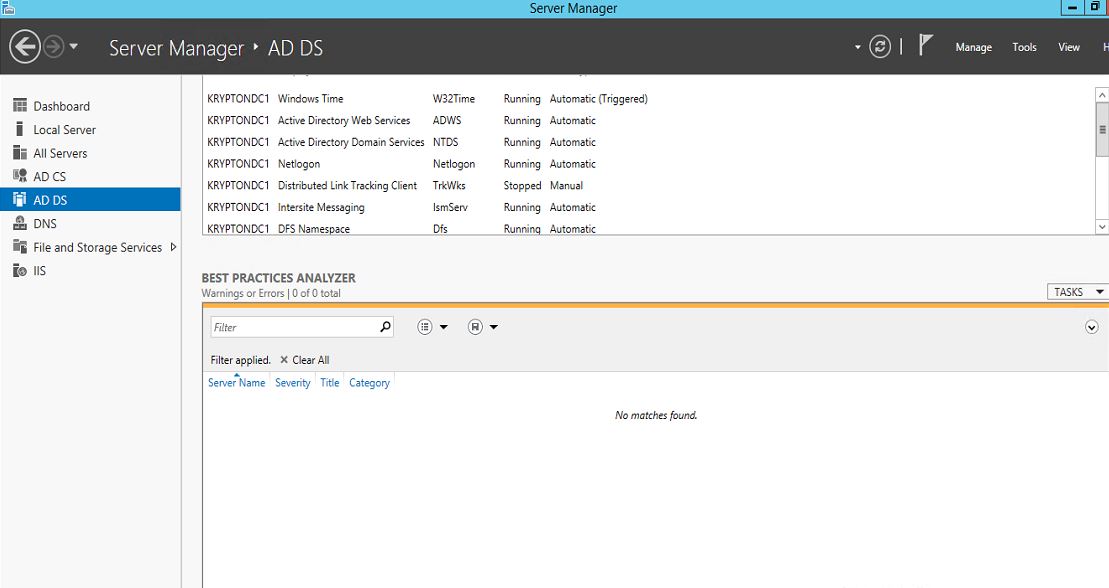
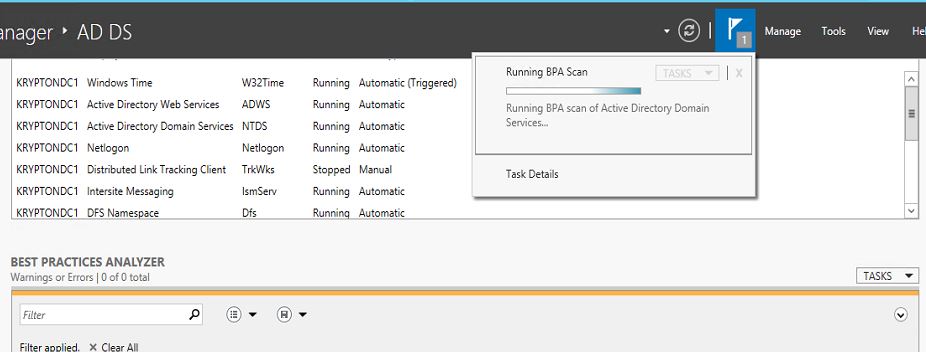
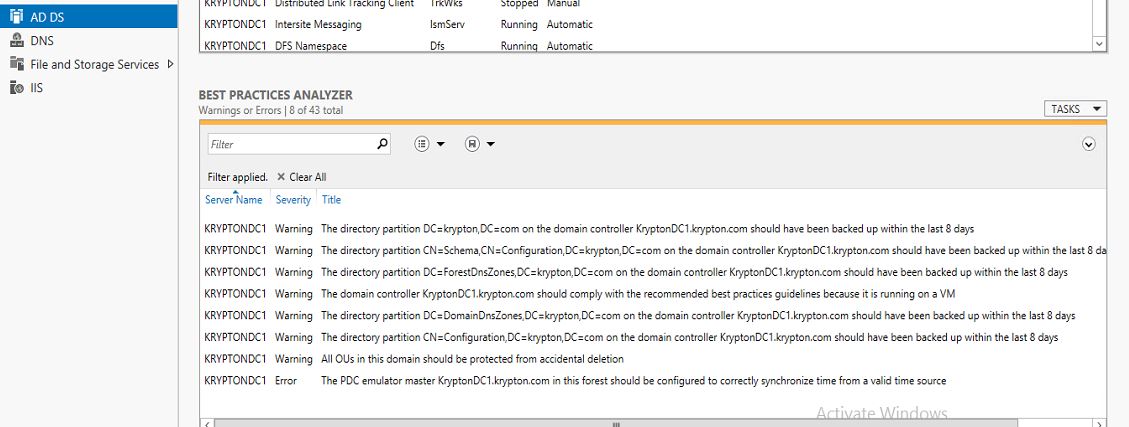
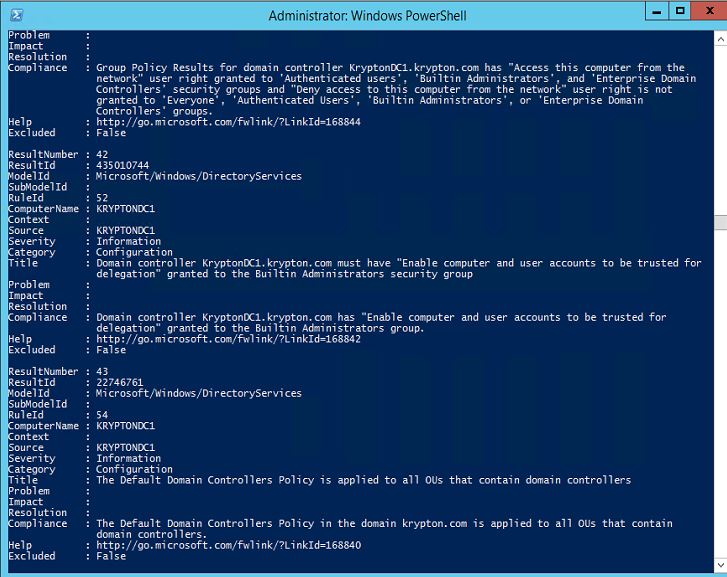
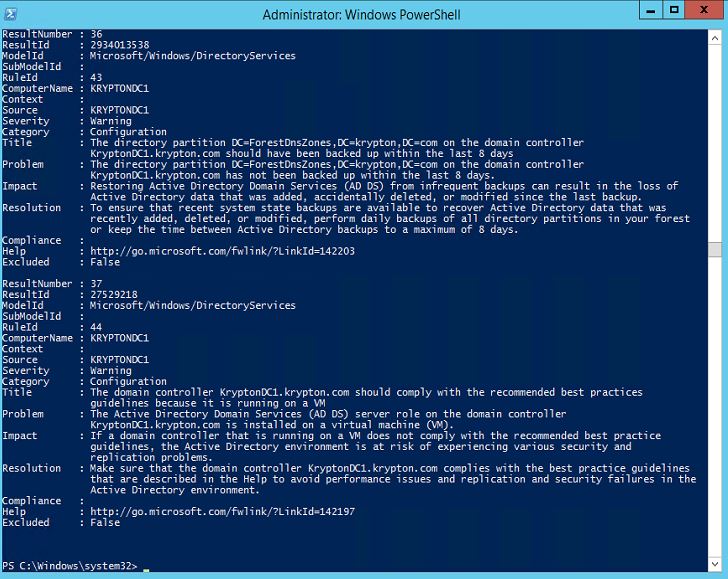
- Exchange Best Practices Analyzer
The Exchange Best Practices Analyzer programmatically collects settings and values from data
Repositories such as Active Directory, registry, metabase and performance monitor. Once collected, a set of comprehensive ‘best practice’ rules are applied to the topology. The Microsoft Exchange Best Practices Analyzer is designed for administrators who want to determine the overall health of their Exchange servers and topology. The tool scans Exchange servers and identifies items that do not conform to Microsoft best practices. You can download from here: Exchange Best Practices Analyzer https://www.microsoft.com/en-us/download/details.aspx?id=22485
Preparing the server for Exchange 2016
Assuming you are installing your exchange 2016 server on a physical server with windows server 2016 Os (make sure you install all required and latest windows updates)
Exchange 2016 latest version
Microsoft .NET Framework 4.5.2 (Offline Installer)
Unified Communications Managed API 4.0 Runtime
Open Windows PowerShell and run the following command to install the Remote Tools Administration Pack.
Install-WindowsFeature RSAT-ADDS

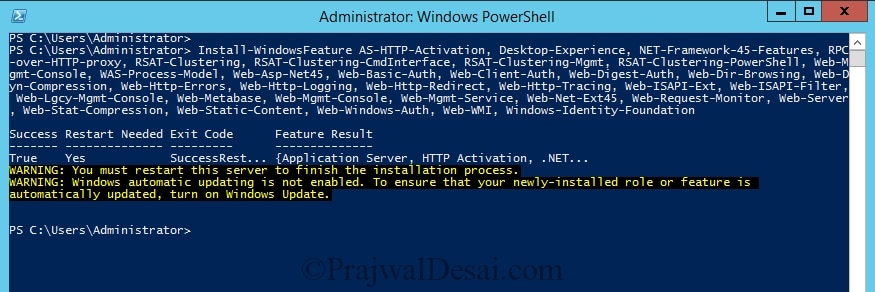
Now we need to install prerequisite for installing the Exchange Server 2016, on our windows server 2016 Launch the Windows PowerShell (run as administrator). Run the following command to install the required Windows components. You must restart after the server to complete the installation process.
Install-WindowsFeature NET-Framework-45-Features, RPC-over-HTTP-proxy, RSAT-Clustering, RSAT-Clustering-CmdInterface, RSAT-Clustering-Mgmt, RSAT-Clustering-PowerShell, Web-Mgmt-Console, WAS-Process-Model, Web-Asp-Net45, Web-Basic-Auth, Web-Client-Auth, Web-Digest-Auth, Web-Dir-Browsing, Web-Dyn-Compression, Web-Http-Errors, Web-Http-Logging, Web-Http-Redirect, Web-Http-Tracing, Web-ISAPI-Ext, Web-ISAPI-Filter, Web-Lgcy-Mgmt-Console, Web-Metabase, Web-Mgmt-Console, Web-Mgmt-Service, Web-Net-Ext45, Web-Request-Monitor, Web-Server, Web-Stat-Compression, Web-Static-Content, Web-Windows-Auth, Web-WMI, Windows-Identity-Foundation
- Extend the Active Directory schema
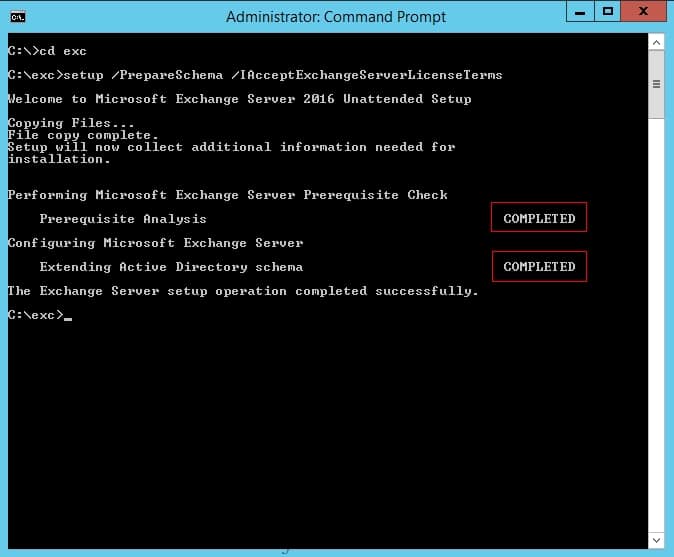
Before you install Microsoft Exchange Server 2016, you need to extend the active directory schema and prepare your Active Directory forest and its domains. Mount the Exchange Server 2016 installation Media. Launch Command Prompt (run as administrator) and navigate to path where setup files are present. Once you successfully enter the below command, the prerequisite analysis and extending AD schema steps should shows the status as Completed.
You can run the PowerShell command Get-ADInfo.ps1 or Get-ADForest for getting the Active Directory information of the current forest. Since, we already have the Exchange Server 2010 environment and we need to check the current Exchange schema version before applying the any update. For that you can use the one liner, which is created by Exchange Server MVP Michael B Smith.

Navigate to the exchange 2010 installation files folder and execute the below:
Setup.exe /PrepareSchema /IAcceptExchangeServerLicenseTerms
Next step is to prepare the Active Directory. The Account used to run the schema update and AD preparation must be a member of Enterprise Admins and Schema Admins. In the same command prompt that you launched, run the below command by replacing organization name with a name.
Setup.exe /PrepareAD /OrganizationName:”<organization name>” /IAcceptExchangeServerLicenseTerms
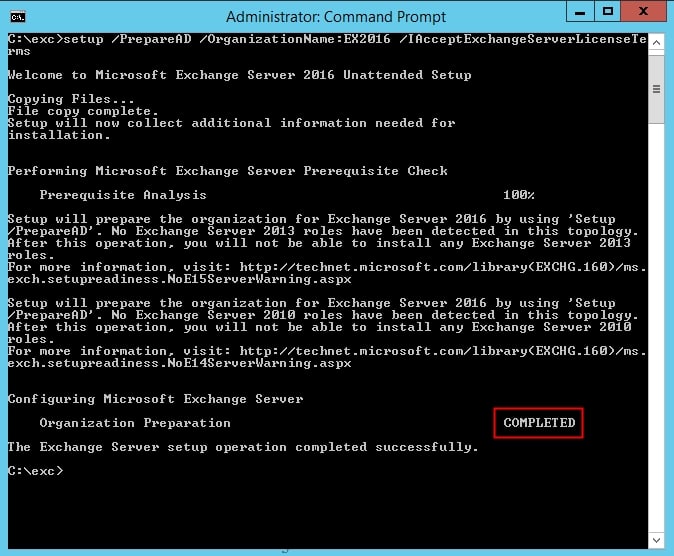
You have now prepared your server to install Exchange Server 2016.
After applying the schema update we can check the version number again

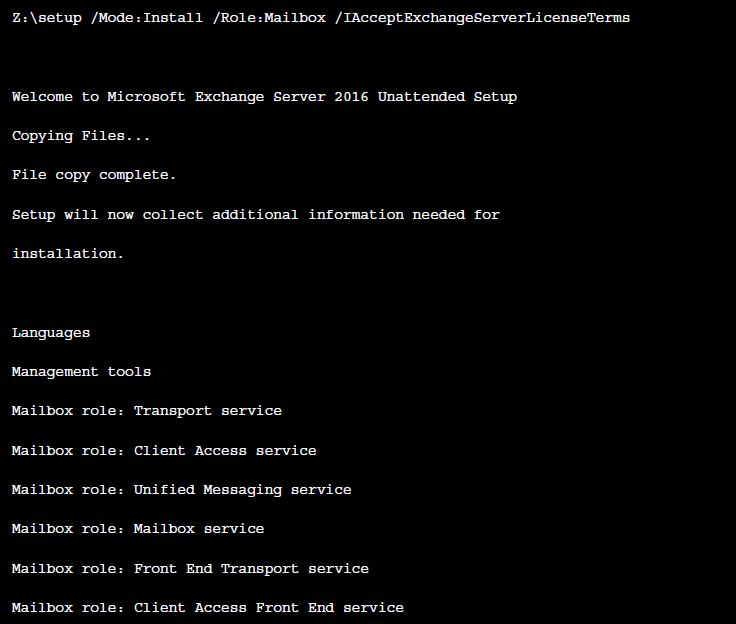
Installing Exchange Server 2016
Once we have completed the Exchange Server 2016 pre-requisites on server now we can start the installation of Exchange Server 2016 mailbox role with below command:
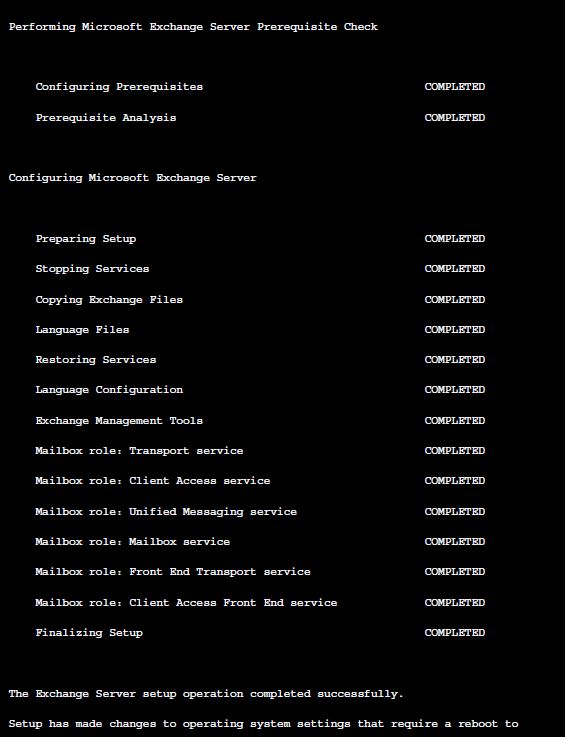
After setup has completed restart the server before doing any configuration on Exchange Server
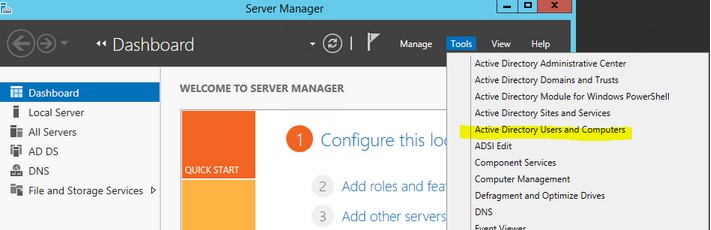
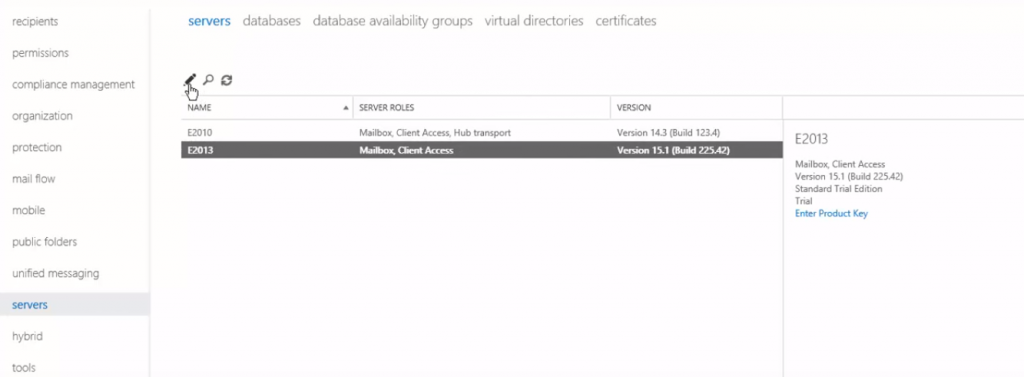
- Once installation complete open Exchange Administrative Center.
When launching EAC via local host we are getting the certificate error because we have not installed the SSL certificate, just click on “continue to this website to access” the EAC
After successfully login we can see the all legacy mailboxes under the recipients.
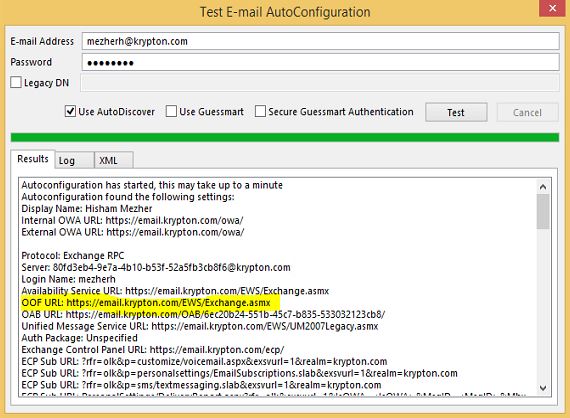
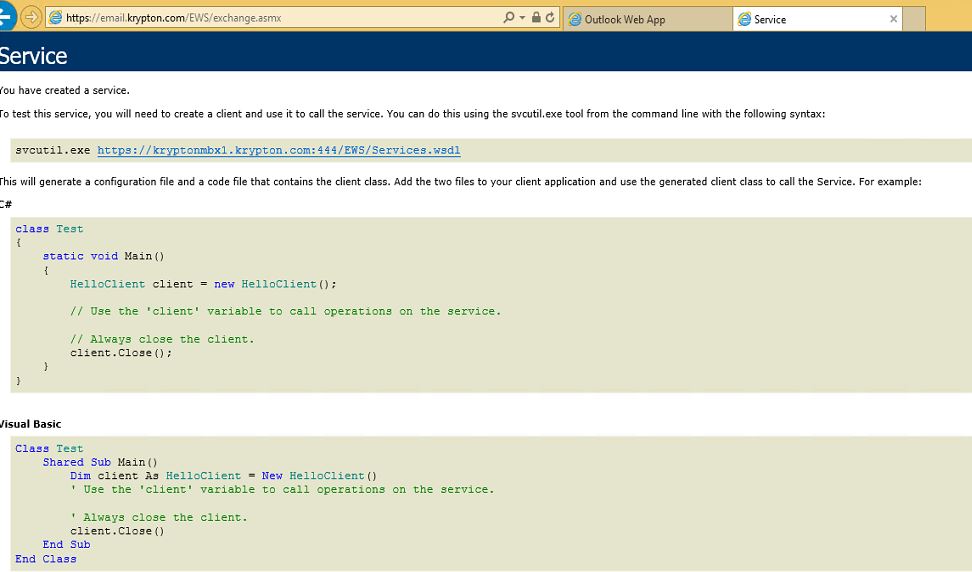
- Updating Autodiscover (SCP)
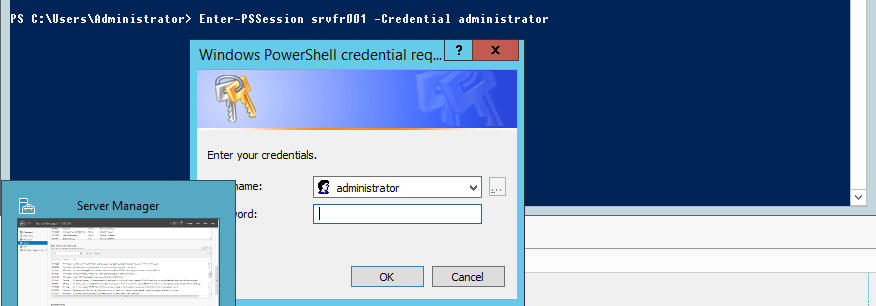
After installing Exchange 2016 successfully, update the Service Connection Point for AutoDiscover. To do this, use the Set-ClientAccess command from Exchange Management Shell.
Go to the Exchange Management Shell, and type this command:
Set-ClientAccessService -Identity E2016 -AutoDiscoverServiceInternalURI https://autodiscover.yourURL.com/Autodiscover/Autodiscover.xml
Next, update the settings of Outlook Anywhere. To do this, go to EAC, and click on servers on the left hand side. This will open up the list of servers. Click the Edit icon and a pop-up will open. Choose the Outlook Anywhere option, and update the DNS lookup and IMAP4 settings with the name of the new server.
Once you’ve configured the settings, run IIS RESET. To do this, go to your command prompt and run the command iisreset. This will stop and restart IIS services.
The next step is to configure your Receive Connector to relay email applications. To configure this, go to the mail flow option in your EAC, click on a connector, and edit it.
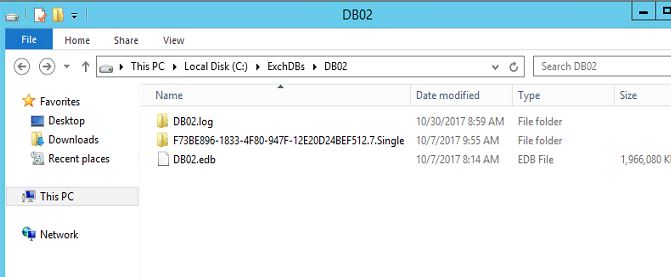
Next step is to create a new database to host the user’s mailboxes. The new database is to be on a separate data drive following the hardware recommendations for RAID configurations.
In our case the drive E will host all databases.
Create a new database as below:
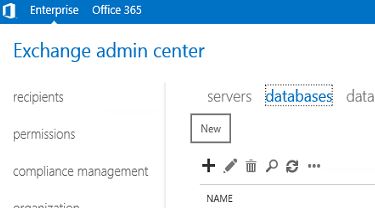
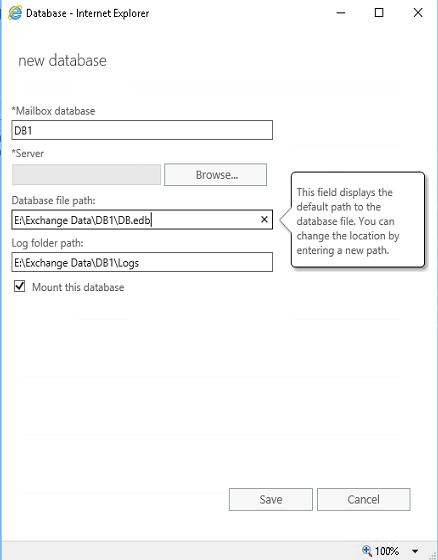
Under EAC go to servers > databases and create new database by clicking the + sign:
Type the DB name and choose the server to host the database. Also make sure to change the file path to the proper folder names.
Once that’s done, update the OWA directory. Exchange 2016 supports acting-as-a-proxy for 2010, so both the versions can coexist using the same URLs. Now, change the OWA and autodiscover URL to Exchange 2016, to ensure all URLs go through Exchange 2016. Use the below script to do that.
$Server = “Exchange2010”
$HTTPS_FQDN = your_URL
Get -OWAVirtualDirectory -Server $Server | Set -OWAVirtualDirectory -ExternalURL $null
Get -ECPVirtualDirectory -Server $Server | Set -ECPVirtualDirectory -ExternalURL $null
Get -OABVirtualDirectory -Server $Server | Set -OABVirtualDirectory -ExternalURL $null
Get -ActiveSyncVirtualDirectory -Server $Server | Set -ActiveSyncVirtualDirectory -ExternalURL $null
Get -WebServicesVirtualDirectory -Server $Server | Set -WebServicesVirtualDirectory -ExternalURL $null
Enable -OutlookAnywhere -Server $Server -ClientAuthenticationMethod Basic -SSLOffloading $False -ExternalHostName $HTTPS_FQDN
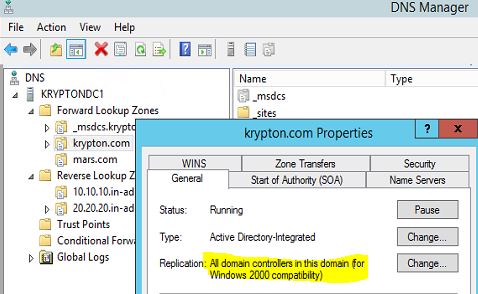
Lastly, update the DNS, so it points to autodiscover and OWA. Under DNS Manager, change the record to ensure that it points to the new exchange 2016 URL name you specified in the above script.
- Configure Receive Connector
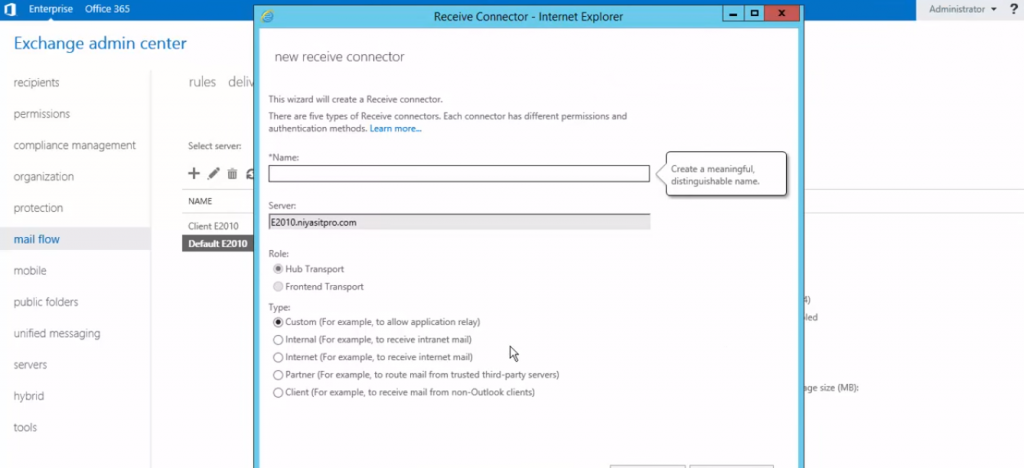
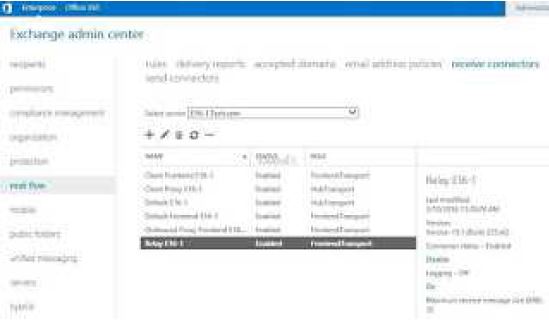
Next step is to configure the receive connector on Exchange 2016 as per Exchange 2010. Default and client connector are already created. Open the Exchange Admin Center select mail flow tab and select receive connectors.
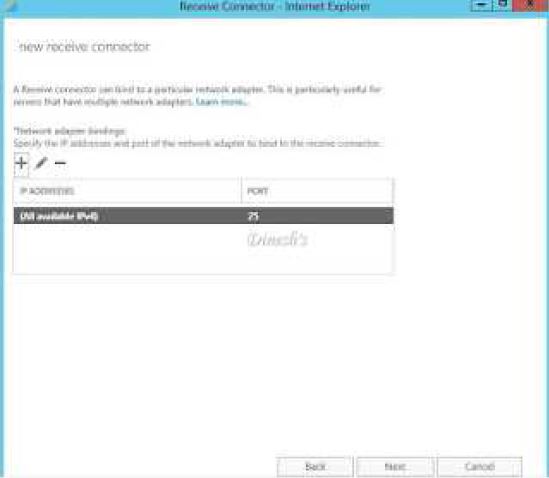
Click on + sign it will give you a new wizard for new receive connector, give the name of the connector and select “Frontend Transport” from Role and select “Customize” from the type.

Next we will select the Network and default port will be 25 for SMTP
Next we have to choose IP addresses that the receive connector will accept mail.
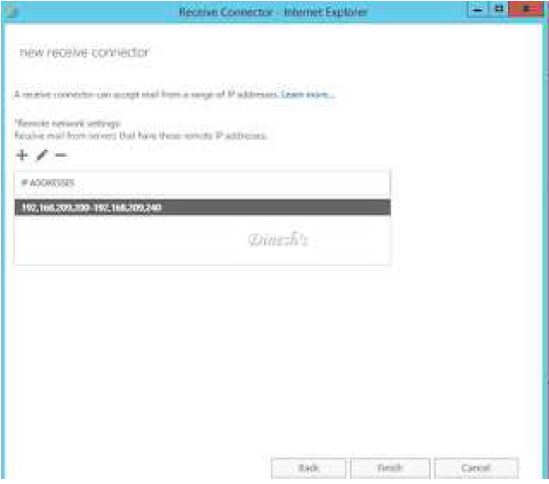
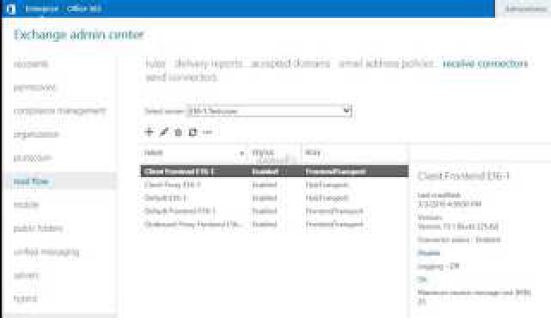
Once complete you can see the connector in EAC.
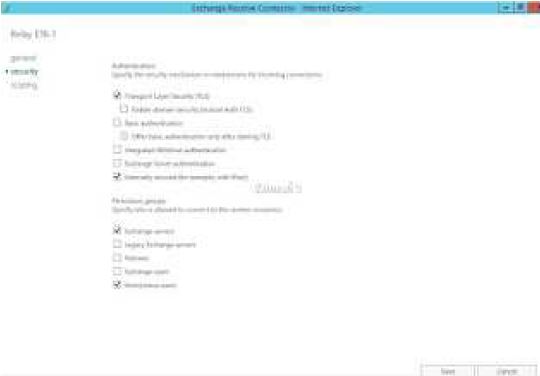
Now click on edit for newly created receive connector and select the security tab and select the “Externally secured” from authentication and select Exchange servers and Anonymous users from permission groups.
Testing Exchange 2016 functionality
Before we can move namespaces and mailboxes across to Exchange Server 2016 we need to do test the new server is fully functional.
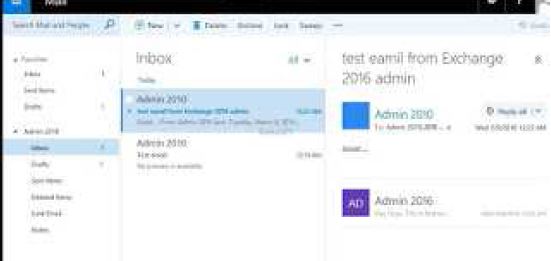
I created some mailboxes in Exchange 2016 and test the email flow, i sent email from my Exchange 2010 admin account to Exchange 2016 admin it work fine.
Updating the Exchange 2010 Virtual Directory URLs
As you know Exchange 2016 can support as a proxy for Exchange 2010 servers. It means that it is easy to allow Exchange 2010 and Exchange 2016 to co-exist using the same URLs to accessing the services. Now we can move the autodiscover.test.com from Exchange 2010 to Exchange 2016, along with this we have to change the DNS so that Https client traffic will go via Exchange 2016 to Exchange 2010 servers.
Update Internal DNS records and switching External HTTPS Connectivity
We need to update the internal DNS record to direct traffic internally at the Exchange 2016 server, we need to change internal DNS records so that both the autodiscover name and HTTPS namespace are configure with the new IP address (Exchange 2016).
Client will not be immediately redirect to use the Exchange 2016 server as the proxy for client access, as soon as client can access the server retry login and client access to ensure no issues exit. If internal client can access works fine than update the external HTTPS publishing.
Change Mail Flow Routing
As we tested Exchange 2016 can receive mail and delivered to Exchange 2010 users, default Exchange 2016 is already configured to receive email from the Internal using Anonymous permissions on the default receive connector.
Also we have to ensure that inbound mail flow is not interrupted before moving on to migrating.
On exchange ECP go to send connector and adjust the send connector to Internet to allow the new exchange 2016 in the senders list to external websense relay.
Next step is to make changes outbound mail flow and allow to Exchange 2016 take the outbound email flow rather than via Exchange 2010 server. We have to make sure firewall rules allow the Exchange 2016 server IP address to initiate connections to Internet hosts on TCP port 25. Once ensure that the Exchange 2016 server is allowed to relay outbound mail, than we are ready to update the Send Connector. In my case I have Juniper firewall, I logged in to the firewall interface and created new rule to allow port 25 between the local subnet and especially exchange 2016 IP to the email relay server which in my case is websense. Then I went to websense and added the exchange 2016 IP to authorized mail senders and added the exchange 2016 server to inbound list of servers allowed to receive emails.
Tested with external addresses and internal addresses all email traffic went successful and delivered to both ends.
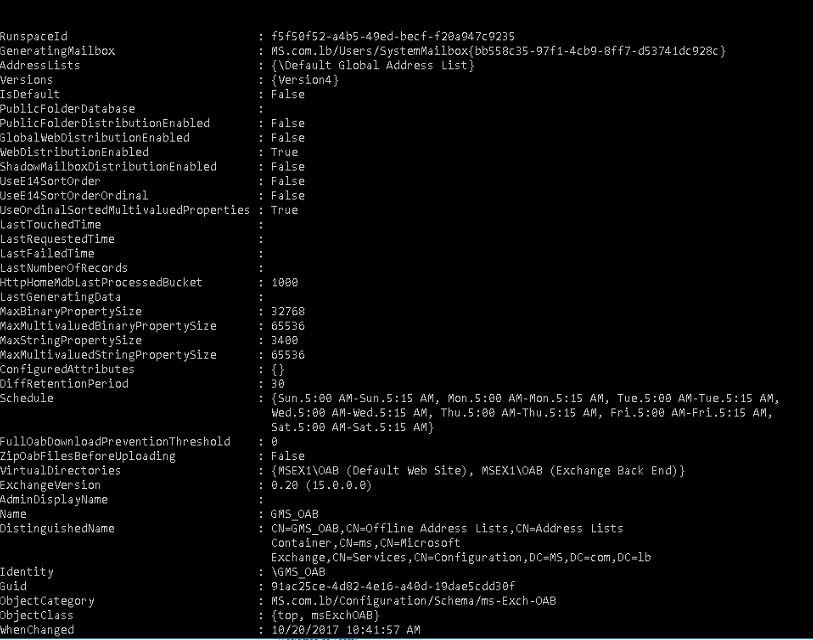
Creating New Offline Address Book (OAB)
As part of the installation of Exchange 2016, a new offline address book was created and set the default. Now we want to create new OAB so that i will remove old Exchange 2010 OAB.
Open the PowerShell and type below command
New-OfflineAddressBook –Name “OABEX16” –AdressLists “\Default Global Address List”
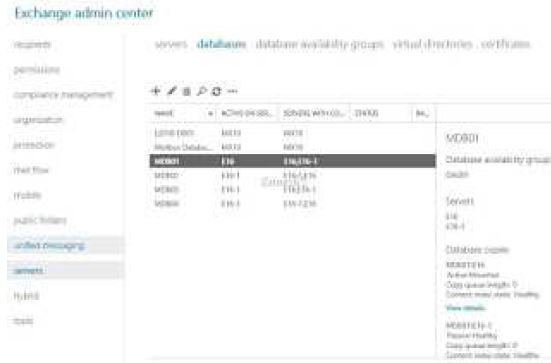
Assigning an OAB in Exchange 2016
Open Exchange 2016 ECP with Administrator account.
Click on “Servers” and select “Databases” select database you want to assign the OAB
Click on “Edit” and Click on “Client Setting”
Click on Browse
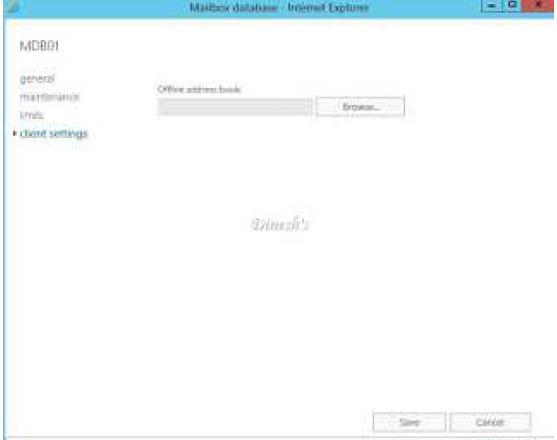
Select the new OAB, which we just created.
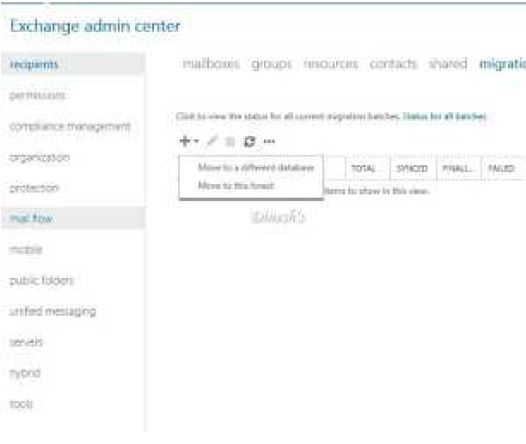
Migrating the Pilot Mailbox
We do have number of methods that can be used to migrate mailboxes from Exchange 2010 to
Exchange 2016, such as Exchange Admin Center
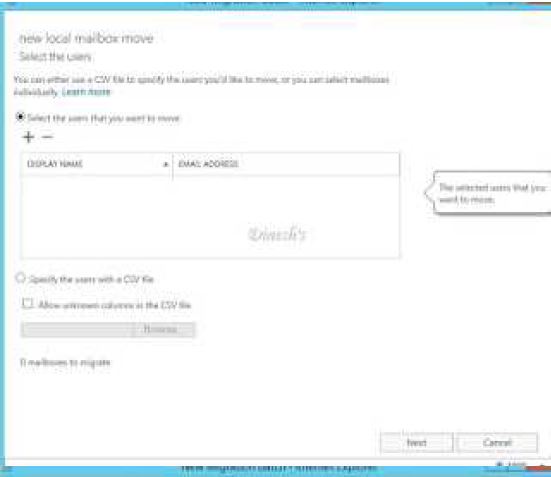
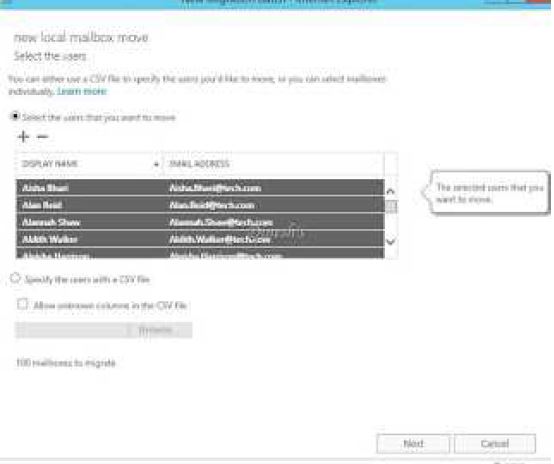
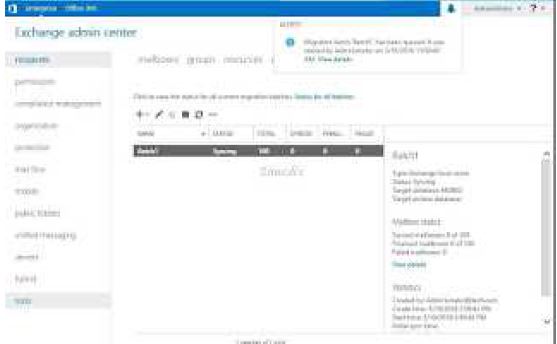
Open ECP select recipients and select migration tab, then click on + sign and select move to a different database
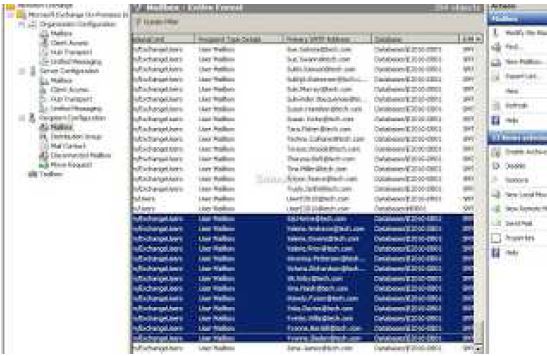
Select the mailboxes which you want to migrate.
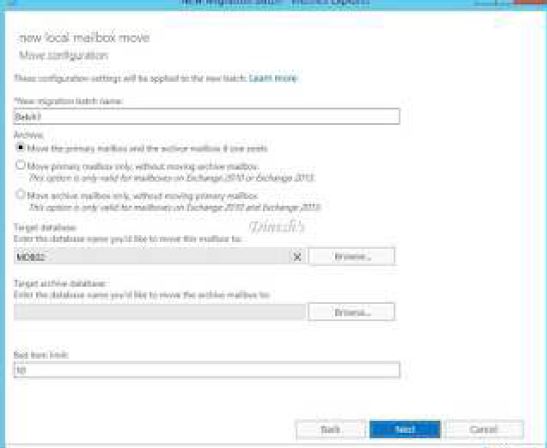
Give the Batch name and select the target database and select other required options.
Select the recipients which will get the notification after complete the Job and select preferred option to complete the batch.
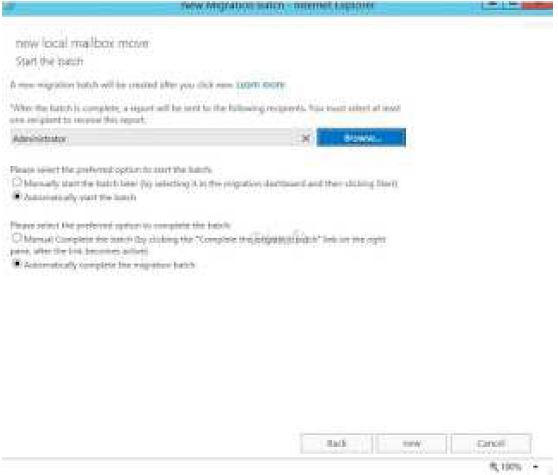
Once finish it will sync
Second easy option to use the Power Shell to migrate the mailboxes. Open PowerShell and type below command, as i have multiple mailbox so i’m using export csv option.
Import-CSV “C:\Move.CSV” | Foreach (New-MoveRequest _identity $_.Identity –TargetDatabase MDB01)

Now you can monitor the move request with command Get-MoveRequestStatistics
If you want you can check the Exchange 2010 EMC for mailbox hosting database and servers.
Once moved pilot users, now i have Exchange 2010 and Exchange 2016 users, before moving forward i will check the client end functionality. From Exchange 2016 i sent email to Exchange 2010 and getting smooth delivery vice versa its working.
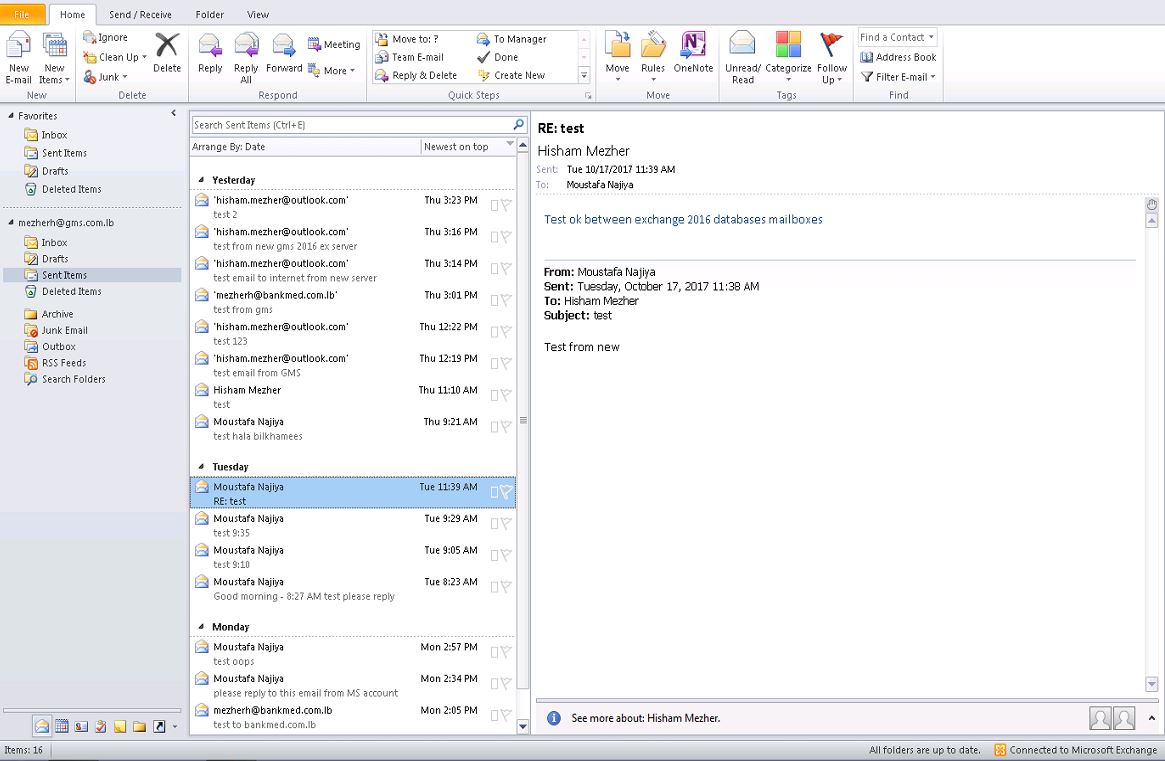
Also i verify the Outlook calendar whether availability is working or not, and found its working as expected vice versa.
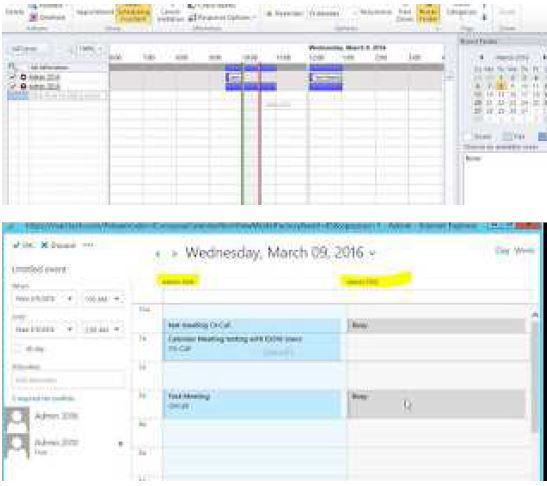
This means my end user are not having any issues.
Please bare in mind that it is very important to assign a certificate for IIS, SMTP services and preferable to have the certificate from an authorized CA however for testing purposes you can generate a certificate from your internal CA.
Thats it for today, hope to see you soon in another post.
Regards;
Hisham Mezher